Rain guard window visors are popular automotive accessories that protect your vehicle from the elements, including rain, snow, or wind while providing air flow from a lowered window while driving.
If you’ve recently purchased a set of window visors for your vehicle, or have questions on how to install it at home, we have you covered.
The installation and removal processes can vary between types of window visors, but most follow some basic steps. We’ll get your vehicle ready for the road in no time with our quick step by step guide.
What is a window visor?
Types of Window Visors
Rain Guard Window Visors Installation Guide
How to Remove Rain Guard Window Visors
Advantages of Tough Guard Window Visors
What is a window visor?
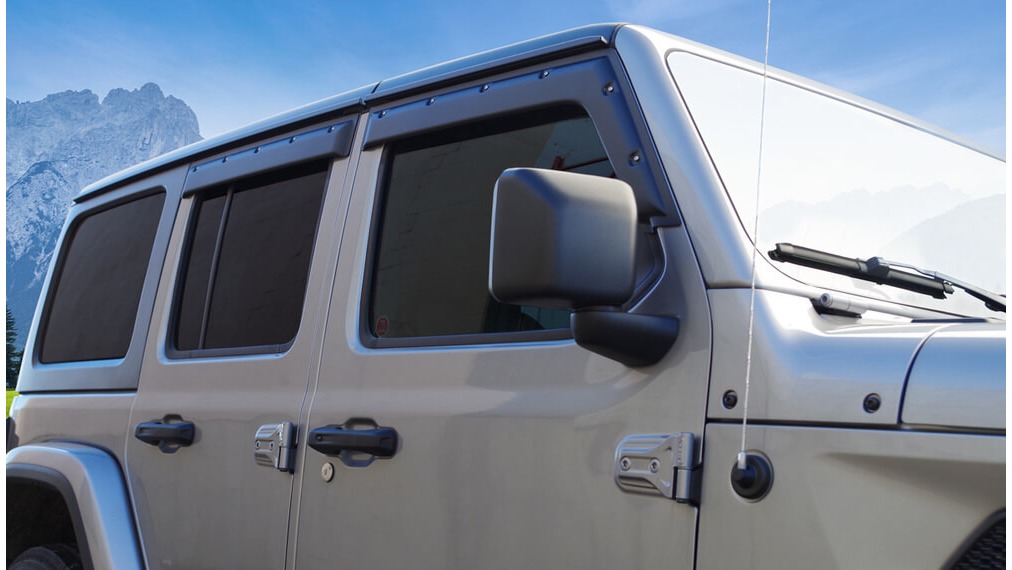
A window visor is a popular exterior automotive accessory for sedans, pickup trucks, Jeeps, and SUVs, that commonly attaches to the top of a vehicle's door frame.
High quality window visors protect your vehicle from the elements, including wind, rain and snow, while offering desired air flow and circulation from a lowered window. They also provide added protection from vehicle break-ins by covering the top of the door’s frame, especially if a window was left slightly lowered.
A window visor is also known as a rain guard, window deflector, wind deflector, and vent deflector, as its main design purpose is to deflect rain, snow, and reduce wind noise while driving with a lowered window.
Types of Window Visors
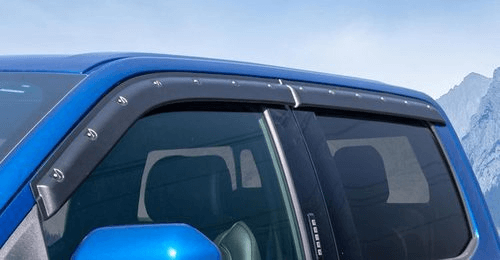
Exterior Stick On Window Visors
The most popular window deflectors attach to the exterior part of a vehicle’s door frame, above the window using double sided automotive tape. They can be constructed from a strong acrylic plastic material, or with a metallic base such as stainless steel or chrome.
Both acrylic and metallic exterior stick-on window visors are popular as they offer easy installation, great protection from splashing rain and reduce wind noise when a window is lowered. They also match other exterior design features on most vehicles, as well as exterior accessories such as hood bug deflectors or fender flares, which are common on pickup trucks, Jeeps, and SUVs.
In-Channel Window Visors
Another popular window deflector option are in-channel visors which attach to the interior portion of a door frame, in the window’s channel, either with an adhesive strip or small clips.
The installation process can be a bit more difficult as the tape may not stick as well in the channel and the deflectors typically need to be bent slightly to fit correctly. The installation can take more than 24 hours to complete as the window will need to be closed in order for the adhesive to stick well in the window channel at the correct angle.
A common problem with in-channel window deflectors is that they can interfere with automatic window sensors, which are common on most vehicles built in the past twenty years, causing a window to lower automatically as it attempts to close.
Rain Guard Window Visors Installation Guide
Installing a set of exterior stick-on window visors, such as a Tough Visor branded window rain guard vent deflectors, is simple to do at home in less than 30 minutes.
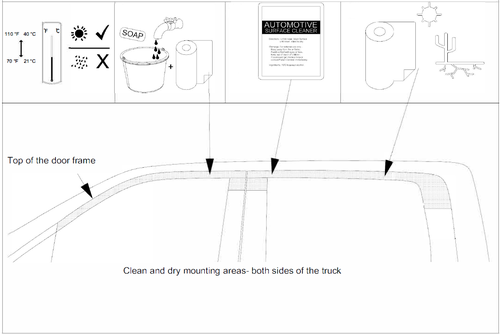
Whether you’re completing the installation in a garage or on your driveway, the ideal temperature for installation is between 21-40 degrees Celsius (68-110 degrees Fahrenheit) with low humidity. If it’s too cold, hot, or humid, the 3M automotive adhesive will not stick well.
Start by laying out all the installation components on a table. The exact number of bolts, screws and pieces required for assembly will vary slightly by vehicle.
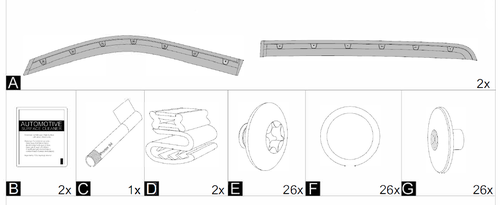
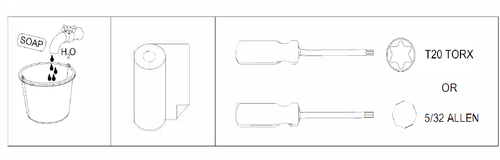
Required Tools for Installation:
- Screwdriver with T20 Torx or 5/32 hex / Allen key;
- Water and basic soap;
- Paper towels or microfiber cloth;
- Automotive Surface Cleansing napkin (provided in packaging)
1) Clean the Door Frames
- Ensure the area on the vehicle’s doors where you’ll be installing the window visors are clean and dry prior to the installation of any components.
- Wipe down the area with some basic soap and water; remove all soap residue and ensure the area is dry.
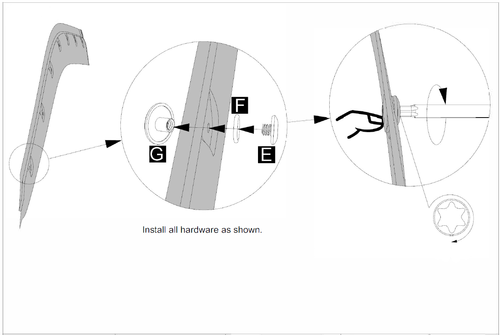
2) Install Torx Screws on Hardware
- Place the washer into the hole of the screw.
- Screw the Torx head through the washer.
- Loosely thread the screw into the mounting pedestal in each location.
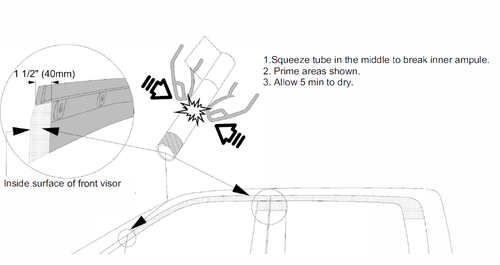
3) Use Primer on Mirror Base and Black Vinyl Door Trim
- Use the provided tube of primer on the edge of the mirror base and the black vinyl door trim ONLY.
- Do Not apply primer along the entire door frame.
- Squeeze the primer tube in the middle to break the inner ampule.
- Allow at least 5 minutes for the primer to dry.
- Repeat on the passenger side of the vehicle.
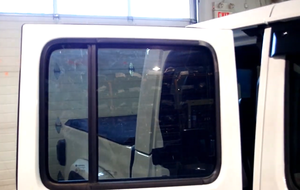
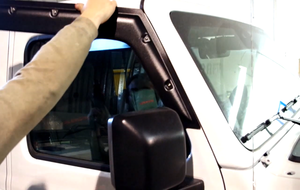
4) Install Rear Visor
- Start at the front end of the back door, and slowly remove the protective backing while pressing the rear visor in place against the door frame.
- Ensure the placement of the rear visor is aligned with the top of the door frame.
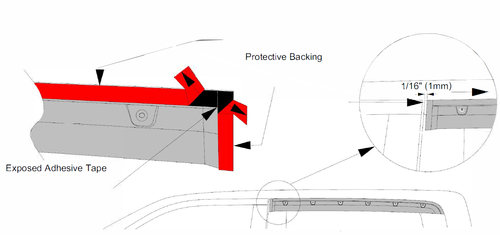
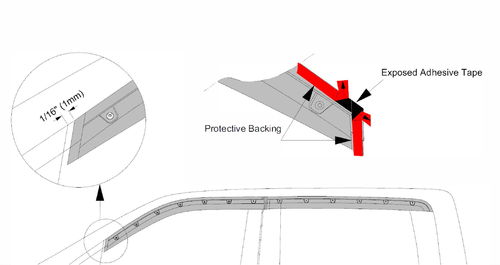
5) Install Front Visor
- Start at the rear of the driver’s door, and slowly remove the protective backing while pressing the front visor in place against the door frame.
- Ensure the placement of the front visor is aligned with the top of the door frame.
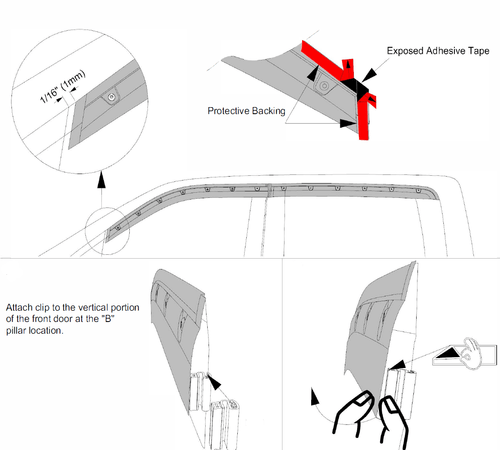
6) Install B Pillar Filler or Clip
- Note: Not all vehicles require this attachment, so please ignore this step if it was not included in your installation package and instruction kit.
- Attach the provided clip to the vertical portion of the front door at the B pillar location.
- If provided a B pillar filler instead of a clip (eg. Jeep Wrangler), work from the rear of the filler and remove the protective backing while pressing the visor in place.
- Ensure the placement of the filler and visor are aligned with the top of the B pillar.
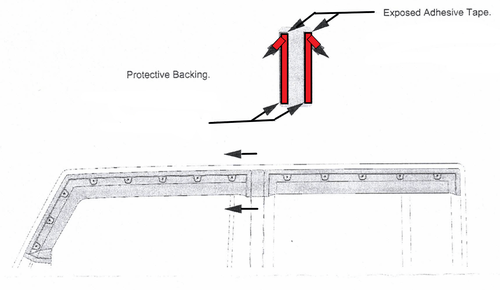
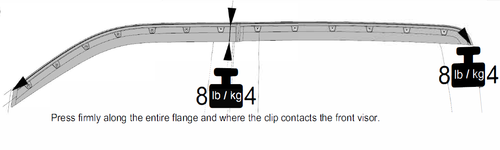
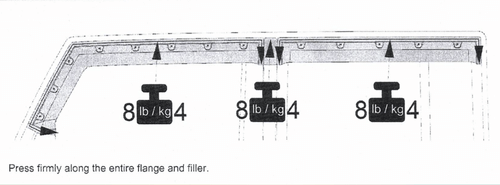
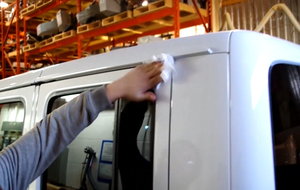
7) Press Firmly along Visor
- Ensure to press firmly along both the front and rear visor.
- Press firmly on the area where the B pillar filler or clip contacts against the vehicle and front visor.
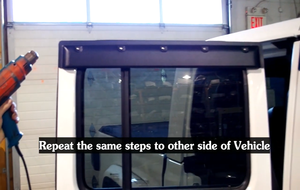
8) Repeat Steps 4 - 7 on Passenger Side
Once both sides are complete, you’re ready to enjoy your ride with the desired air flow of a lowered window regardless of the weather conditions.
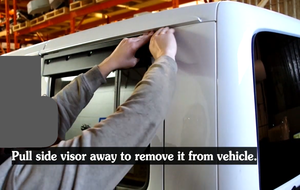
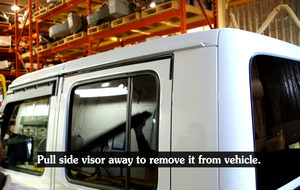
How to Remove Rain Guard Window Visors
If you ever need to remove the window visors from your vehicle, the process is simple to complete at home. Better quality rain guard window visors use premium 3M tape which shouldn’t damage the paint on your vehicle’s door frame. However, it’s crucial you slowly remove any pieces with adhesive in order to have a clean finish with no glue residue.
Required Tools for Removal:
- Screwdriver with T45 Torx and phillips head;
- Heat gun or blow dryer;
- Water and basic soap;
- Paper towels or microfiber cloth
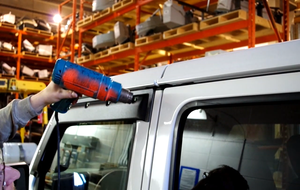
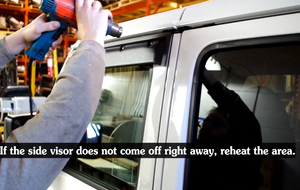
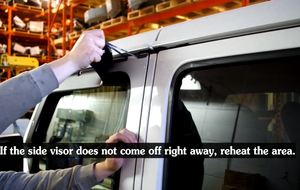
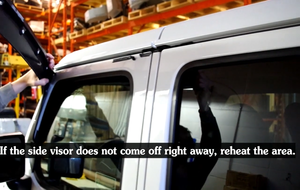
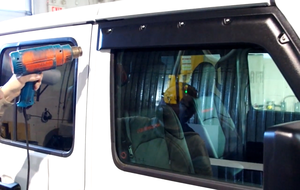
1) Heat the Visor
- Slowly move a heat gun or strong blow dryer back and forth over one visor.
- This loosens the adhesive backing and makes it easier to remove the visor.

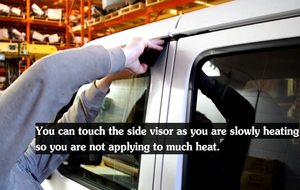
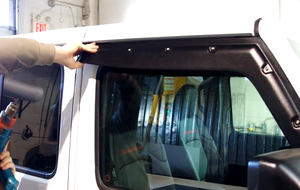
2) Slowly Remove First Visor
- Slowly pull the first heated visor, starting on one end.
- If there's too much resistance, continue heating the visor.
- Once loose, continue pulling until the visor has been removed from the vehicle.
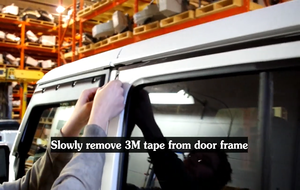
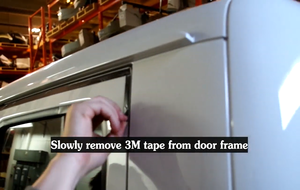
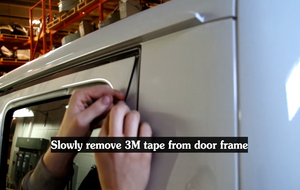
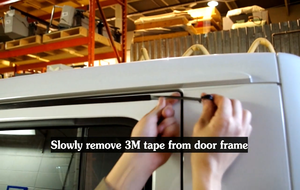
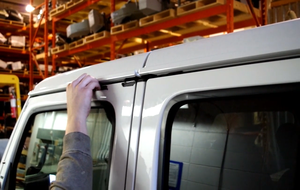
3) Slowly Remove 3M Automotive Tape
- Slowly remove the remaining 3M automotive tape that is still stuck to the vehicle's door frame.
4) Repeats Steps 1-3 for Next Visor
- Heat the visor.
- Slowly remove the visor.
- Slowly remove 3M automotive tape.
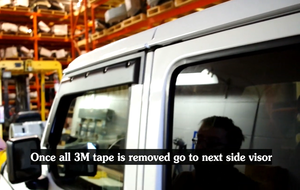
5) Repeat Steps 1-4 for Passenger Side Visors
- Heat the back visor.
- Slowly remove the visor.
- Slowly remove 3M automotive tape.
- Repeat for front passenger door visor.
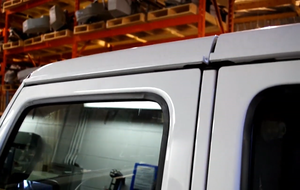
6) Wipe Down Door Frame
- Some small debris and particles of adhesive may still be stuck to the door frame.
- Wipe down the door frame with a damp microfiber cloth or paper towel that won't scratch the vehicle's paint.
- If needed, apply some basic soap that won't harm the paint and wipe dry.

Summary of Removal Steps
- Heat visors with heat gun or blow dryer;
- Slowly remove one visor at a time;
- Slowly remove remaining automotive tape and adhesive;
- Wipe down door frames with a damp microfiber cloth or paper towel
Advantages of Tough Guard Window Visors
Tough Guard rain window visors are produced in Canada from award winning automotive aftermarket manufacturer, Focus Auto Design, and are custom designed to fit for your vehicle's specific make, model, and generation.
Their rain guard window deflectors are thoroughly tested to withstand exposure to Canada's harshest weather, including rain, wind, sun, or snow. The window visors' strong acrylic frame won’t fade, chalk, or break down over time, and they greatly reduce wind noise from a lowered window.
As exterior stick-on window visors, there is no direct contact between the deflectors and the window glass or channel, which makes for an easier installation and removal process. The visors attach with premium 3M automotive tape that won't damage the paint on your vehicle's door frame.
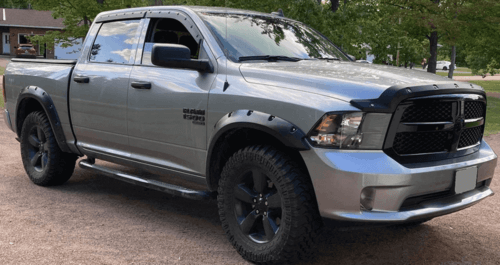
The OEM quality design is suited for the most popular pickup trucks sold in Canada such as Chevy Silverado, Dodge Ram, Ford F-150, GMC Sierra, Toyota Tacoma & Tundra, and Jeep Wrangler & Gladiator models.
We hope this step by step guide was helpful to get your vehicle road ready with properly installed rain guard window visors.
For further details on how to remove Tough Guard window visors at home, please reference the removal video guide found at the link below.
How to Un-Install Tough Guard or FormFit Window Visors